Sashiko Stitch Instructions for beginners
A trend in embroidery: Sashiko stitching and visible mending. This ancient Japanese craft is easy to learn. It gives quick results and makes stunning textile pieces. In this tutorial we explain the basics you need to know about Sashiko stitching. We share our recommendations for Sashiko materials. You will also find step by step guidance on how to Sashiko stitch for beginners.
Feel free to contact us if you still have questions after reading this Sashiko stitching tutorial for beginners.

What materials do I need for my Sashiko project?
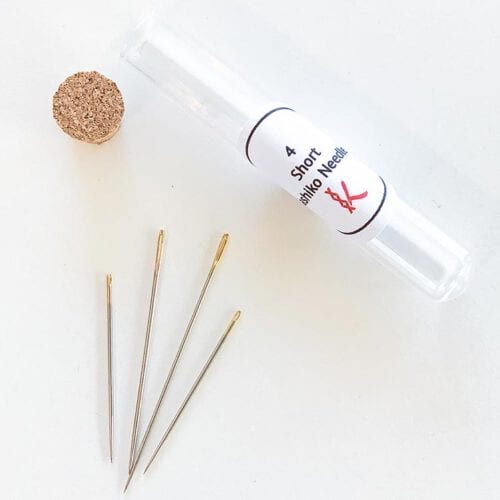
1. Sashiko Needle
Depending on the design of your project, you will need either long or short Sashiko Needles.
Short Sashiko Needles
Short Sashiko Needles are used to make round shapes.
Long Sashiko Needles
Long Sashiko Needles are used to make straight lines. The length of the needle makes it easier to stitch several stitches with one go.

2. Sashiko Fabric
Traditionally you use a dark blue evenweave fabric from linen or cotton which are heavier than broadcloth.
We recommend using evenweave fabrics rather than tightly woven plain fabrics. The open structure of the evenweave fabric makes it easier to weave the needle through the fabric layers.
When creating garments you can use two layers of fabric. Multiple layers make your garment warmer as heat gets insulated in the pockets of air that you make while working the designs.
In our shop you can find an ecological navy blue linen that we love to use for Sashiko projects


3. Sashiko Thread
Traditionally Sashiko is made with a tightly twisted heavy-weight cotton thread.
The special embroidery thread in thickness 6 works very well for Sashiko as the thread won’t split.

You can also use our 6 stranded embroidery floss as this is readily available in Europe.

For a dense look you can also use our No5 Perle cotton.

For an ultra fine look you can use ecological sewing thread.

4. Sashiko Pattern
The inspiration for Sashiko designs usually come from nature. You can recognize rippling water, clouds, and flowers. You can also find stunning geometric designs with interlocking lines, circles, stars, squares, and triangles. You often see repeating designs in a project.
Traditionally most patterns have a meaning or common use. For example, the diamond shape (Hishi) is often seen in Japanese home decor. The beehive (Kikko) design is considered a symbol of good fortune.
With our Sashiko pattern E-book you get direct access to 15 patterns.

5. Transfer Paper or Fusible Interfacing
With Sashiko you trace the pattern onto your fabric using white transfer paper or fusible interfacing


6. Optional: Sashiko Thimble
Usufull when working with the long Sashiko needles to stitch large geometric lines in your work. You use this thimble like a ring with the metal plate on the inside of your palm. Using this thimble you can push your needle through the fabric.

7. Optional: Embroidery Hoop or Frame
To make straight and even lines it helps to use an embroidery hoop

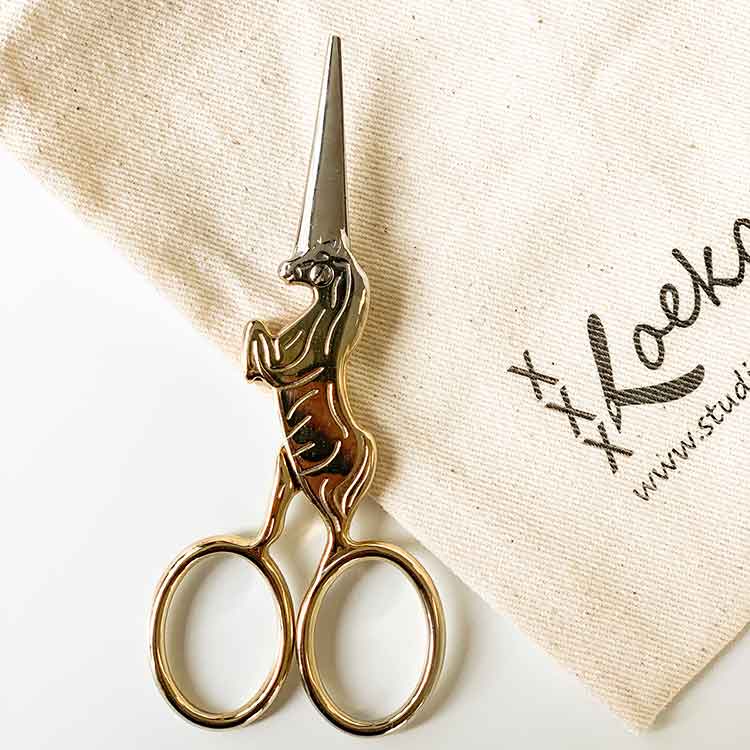
8. Embroidery Scissors
You’ll use the embroidery scissors to cut of all your threads.
We have a few pretty scissors in our shop
9. Optional: Ruler
When working on a pattern with long straight lines it is helpfull to use a ruler to trace your pattern.

10. Optional: Water erasable pencil
When using a ruler, you may prefer to use a water erasable pencil to draw the pattern on your fabric.

How to trace a Sashiko pattern to your fabric using transfer paper?
The steps below explain how you can transfer a Sashiko pattern to your fabric. We use white transfer paper as we are stitching on dark blue fabric.
It is always a good practice to wash your fabric before transferring the pattern and starting to stitch, as it may otherwise shrink in future.
Step 1

Lay your fabric flat on the table. Iron if needed. Lay a sheet of white transfer paper on top of it. Add the pattern as the top layer.
Step 2

Use a pencil to trace the pattern. Push hard enough and you will see white markings on your fabric. If this is your first time – check the technique on a test piece. Ensure you do not move the pattern while tracing it.
Step 3

Remove the pattern and tracing paper and you will see the white markings on your fabric. Ready for your sashiko stitches! And… no worries if you made a few mistakes. You can easily wash them out after you finish stitching.
Tip: if your pattern is bigger than your tracing paper you can carefully move the tracing paper under your pattern as you follow the lines. Take care not to move the pattern
How to trace a Sashiko pattern to your fabric using fusible interfacing?
For bigger projects you may like to use interfacing to transfer a pattern to your fabric. The steps below explain how you can do this
Step 1
Tape your Sashiko pattern on the table and place a piece of white fusible interfacing over it. Ensure you have the glue side (the shiny rough side) down. Tape the corners of the interfacing on the table.
Pro Tip: Use a piece of interfacing larger than your sashiko project.
Step 2
Trace the pattern with a fine tip permanent fabric marker onto your interfacing. When tracing long straight lines it is helpful to use a ruler
Step 3
Take your interfacing and position it on the backside of your fabric with the glue side facing your fabric. Fuse it in place with your iron. Begin in the center of your design. Lift your iron and set instead of sliding your iron to avoid misshaping your design.
Remember: the side with the interfacing is the backside of your project.
How to Sashiko stitch step by step instructions
After transferring your fabric you are ready to start Sashiko Stitching! Yeah! Below you will find step by step instructions to get you started.
A few basic guidelines you can follow during your stitching:
- With Sashiko stitching you basically make a running stitch.
- Sashiko stitches are always longer on the top of the fabric than they are on the backside.
- Stitch as evenly as you can. Whatever length you make your top stitch, make all your top stitches that length, and whatever length you make your backside stitches, make all your backside stitches that length. A rule of thumb for the length of your stitches is to make backside stitched 1/3 the length of the top stitches. Stitch about 2-3 stitches per cm (~4 to 8 per inch).
- Ensure your top stitches do not cross each other at a crossing of lines.
Step 1

Cut about 60 – 75 cm (24 – 30 inch) of thread, and pull it through the eye of your needle. We used all 6 strands of the 6 stranded embroidery floss.
When working on a geometric design, choose a long vertical or horizontal line to begin your stitching.
When working on a pattern with round shapes choose the longest line you can find.
Step 2

Insert your needle 5 cm (2 inch) along the starting line and take several stitches back towards the beginning.
Step 3

Bring your needle to the backside of your fabric. Secure the first thread by passing your needle back through the stitches on the backside of the fabric.
Step 4

Bring your needle to the front side of the fabric and continue stitches along the line. Put as many stitches on your needle as you find comfortable, then gently pull the needle through your fabric.
Step 5

Repeat making stitches. Your last stitch of a line must come up exactly at the corner. When needed, adjust the stitch lenght of the last few cm’s (inch) to make it happen.
Begin your first stitch in the next direction quite close to the corner stitch.
When turning direction, do not pull your thread too tight. It’s better if you leave a bit of slack on the backside (as pictured).
Step 6

When you are about to finish a thread, bring your needle to the backside. Pass the needle through a few stitches in zigzag modus and cut off any excess yarn.
Secure new threads by passing them through a few earlier made stitches on the backside.
Sashiko sequence in stitching
Work lines one by one. Start in one corner and work towards the other side of the fabric. Go back on a new line towards the original side.
Most patterns come with markings to guide you how to stitch them. The pictures below show the stitching guidance of two popular designs.


Sashiko Stitch Like a Pro Tips
Be careful where lines cross. Work as precise as you possibly and humanly can. You get the best result when you try to make the first stitch in each direction to begin at the same distance from the center of the crossing. This means that on the backside of your fabric you may need to make a longer stitch to reach the same starting point at the next line.
Pull your needle gently through the fabric! Do not pull your needle too hard, as this might make your fabric pucker. It’s easier to fix stitches which are too loose than those that are too tight. Loose stitches can be altered by gently pulling your thread on the backside of the fabric.
When working on long lines, use a Sashiko thimble! You use this thimble like a ring with the metal plate on the inside of your palm. Using this thimble you can push your needle through the fabric.
Relax. Take a sip from your favourite drink and take it slow ;-).

How to finish your Sashiko project
When you’ve completed stitching your pattern there’s only a few steps left and you’re finished!
Step 1
Remove any transfer lines made with the carbon paper. You can do this by carefully handwashing your work. Or by using a water spray.
Step 2
Iron your work from the backside. Start in the middle of your fabric. Pull your iron up and down as you move along the fabric, rather than sliding it over the fabric.
Step 3
Frame your first Sashiko in an embroidery hoop. Or turn your Sashiko project into a cushion cover, table cloth, napkin, or toiletry bag. You can also make stunning garments with your project.


