How to weave a bracelet for beginners
In this blog you can learn step by step how to weave a bracelet on one of our looms. We share a list of supplies needed for weaving, and specific tips and tricks for making a friendship bracelet. Weaving a bracelet is a fun afternoon activity and great craft project for birthday parties. You may also like to read our earlier blog with basic weaving instructions for beginners.
Please note that we no longer have the exact looms pictured in this blog in our collection.

Which materials do you need to weave a bracelet?
1. Weaving starter kit
You can use any size weaving loom from our collection for a bracelet. If you purchase a weaving starter kit you directly get a set including weaving comb, weaving needles and warp thread.
Please note that we no longer have the exact looms pictured in this blog in our collection.


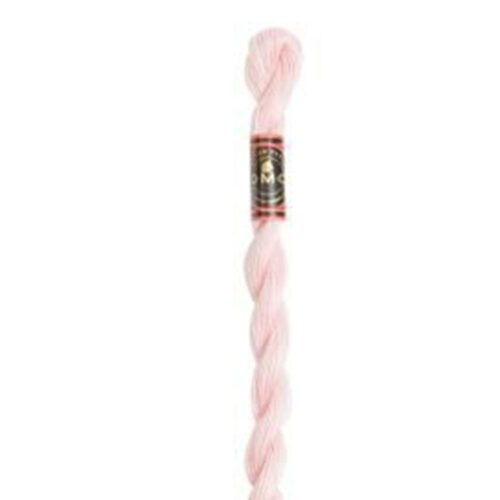
2. Yarn
You can use any yarn that you like, but we recommend to choose one that won’t be itchy. Our Gordita and Lanita wool is nice and soft and great if you like a matte finish. If you prefer shiny, choose for some Perle no5 embroidery thread.

3. Scissors
A pair of embroidery scissors is always handy for cutting your yarn.

4. Measuring tape
You’ll need a measuring tape to measure how long your bracelet should be to fit.

5. Tape or clamps
Once you finish weaving, a piece of tape or clamps are handy while braiding the ends.
Warp your loom
Warp your loom with a double thread. warp as wide as you want your bracelet to be.
When you’re making a bracelet from wool or other stretching yarn, we recommend to use our cotton warp thread to warp your loom. With a non stretching warp your final piece will be nicer.
When you’re using DMC Perle Cotton you can use the same thread for both the warp and weft of your project.
In our weaving tutorial for beginners we explain how to warp your loom.

How long should your weaving project be?
Wrap a measuring tape around your wrist where you’d like to wear the bracelet once it’s finished. Measure the circumference. In my case that’s almost 17 cm (~7 inch).
Deduct 2,5-5 cm (1-2 inch) from the circumference to keep space for opening and closing your bracelet. In my case that’s 17 cm minus 4 cm = 13 cm. That’s is how you calculate the lenght you will weave your bracelet.

How to weave a bracelet step by step
Start with a row of knots
To ensure our edge stays in place, we will start with a row of knots.
Step 1

Start on one of the edges and make a simple knot around the warp thread. Pull taught.
Step 2

Continue to the next warp thread.
Step 3

Pull each knot tight.
Step 4

Continue until you have made a knot around every warp thread.
How to make a basic weave
The following steps explain how to weave using a heddle bar.
Step 1

Use a weaving needle and go through the warp threads. Repeat: under one thread, over one thread. When you use a heddle bar you can use the bar to move half of your threads up and the other half down.
Step 2

This is how you’ll make your first row.
Step 3

Use a weaving comb to move your woven row down.
Step 4

Turn the heddle bar to make the other half of your warp threads go up.
Step 5

Continue until you’re almost finished with your thread.
If you’re almost finished with a thread
To keep your edges nice, it’s better to ensure your thread tail does not end at the edge of your weaving project. But you also want to keep neat rows.
In the next steps we explain how to ensure your thread ends in the middle.
Step 1

When you’re almost finished with a thread use the weaving needle. At the end of the row, go under two warp threads and finish going over the last warp thread.
Step 2

Now go back and go under the first warp thread, over the second and under the rest of the row.
Step 3

From the front it now looks the same as a normal row, but your tread ends in the middle of a row.
How to start a new color
At the start of a new color we also like to prevent that our tail stays at one of the edges. The following steps explain how to do that.
Step 1

Take your weaving needle and go from left to right. Go under all warp threads until you reach the second last of the row. Go over the second last warp thread, and under the last warp thread.
Step 2

Go back from right to left. Go over the first warp thread, under the next two warp threads, and then under and over the next warp threads.
Step 3

Use a comb to move your woven rows down. It will look like pictured.
Now continue weaving as explained earlier.
Finish with a row of knots
Once in a while measure the length of your weaving project. Once you have the desired length, we will finish the piece with a row of knots.
Step 1

Start making a knot around the warp thread where you finished your last row.
Step 2

Continue to the next warp thread.
Step 3

Continue making knots until you finished the row.
How to weave in the thread ends of your bracelet
Step 1

Once you finish weaving turn your weaving loom upside down.
Step 2

As you will wear this piece, we will burry the tails diagonally under 3 stitches.
Step 3

Cut off close to the weaving project.
How to take your finished bracelet weaving from the loom and finish the ends
It’s finally time to take your weaving project from the loom.
Step 1

Slowly loosen de wignuts.
Step 2

Take the warp threads carefully from the loom.
Step 3

Put your weaving loom aside and lay the weaving project flat on the table.
Step 4

Cut through the loops of your warp threads.
Step 5

Divide the warp threads in sets of two threads. Double knot each set close to the edge of your weaving project.
Step 6

Tape on end of your warp threads to the table with some paper tape (painter’s tape). Or clip one end to a clipboard.
Step 7

Braid the warp threads.
Step 8.

Braid as far as possible and then make a knot. Cut off any excess thread. Now braid the other end of your bracelet.
Step 9.

Voilá your project is finished!


When subscribing you allow us to send e-mails to you. You can unsubscribe at any moment you like. Read our privacy policy here


